I often talk to you about Sea Moss, all its benefits, and the fact that this algae is essential to your well-being! But how do you actually prepare Sea Moss gel?
In this article/tutorial, I’ll show you all the preparation steps for use as a gel. There are, of course, other ways of preparing it (powder, ice cubes, raw etc… ), and a multitude of ways of using it which you’ll find in the guide Everything you need to know about Sea Moss. If you want to enjoy its nutrients without delay, visit Shop Original Sea Moss.
If you encounter any problems in making it, please feel free to comment on this article, and I’ll be happy to answer them!
To obtain a 600 ml jar, you need 25g of raw Sea Moss. As you’ll see later, the more water you add, the smoother and less gelatinous the texture will be.
So simply adjust the water according to the consistency you want for your creations.
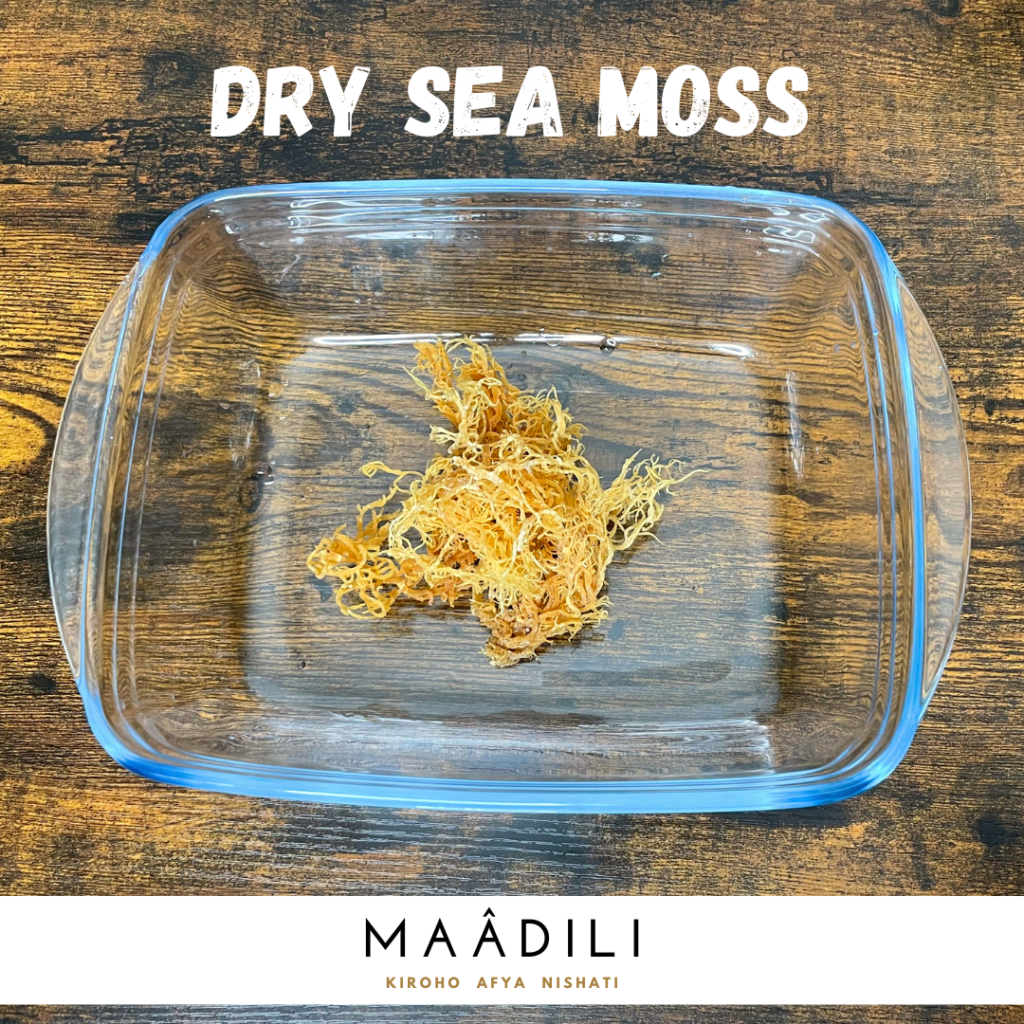
Step 1:
Take a dish, bowl or jar that closes to go into the fridge.
Place 25g of raw Sea Moss
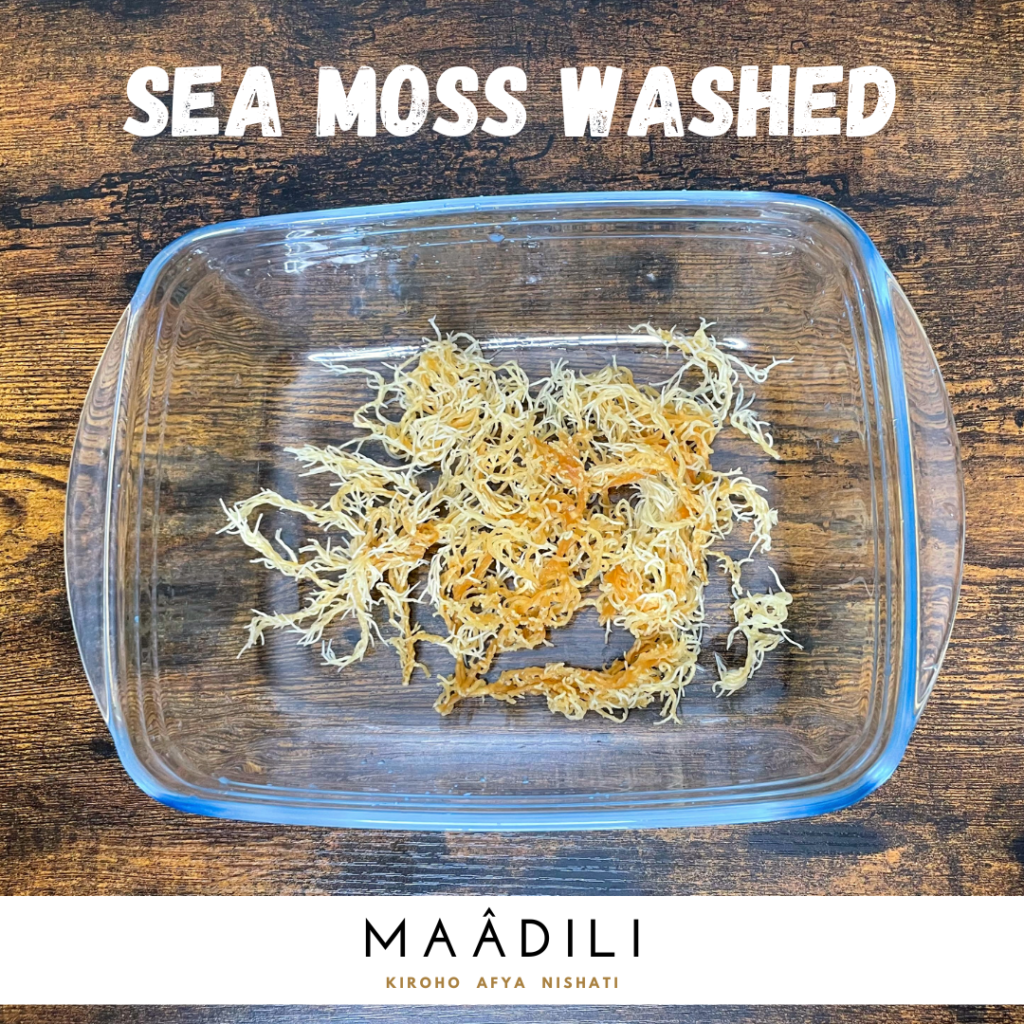
This stage involves thoroughly cleaning your seaweed. Being a raw product, Sea Moss may still contain sea salt agglomerated during drying and natural waste.
Cleaning is very simple. Pour water over the Sea Moss to cover it completely and rub it lightly between your fingers to clean it and remove any small deposits, then discard the water. Repeat this process 2 times.
Once cleaned, you’ll see that the seaweed will start to become denser.
Step 2:
Clean your seaweed 2 times (3 times maximum)
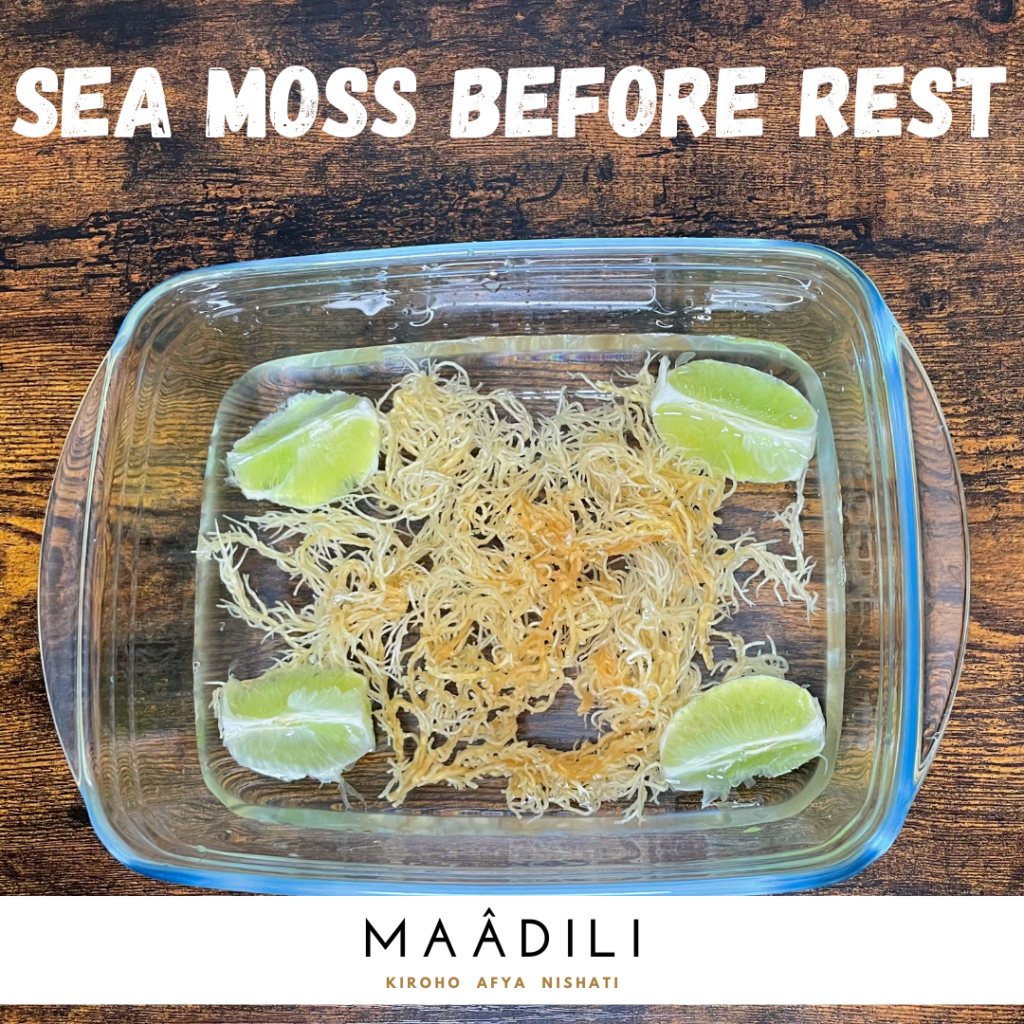
The setting time is important, as it will make your work easier when you put it in the blender. It’s also the ideal time to add other natural elements to perfume and/or embellish it, depending on the skincare routine you’re planning.
Here, I’ve completely covered the Sea moss with Mont Roucous, then added 2 limes for flavor, but also to multiply the antioxidant effect when consumed.
Step 3:
Cover your Sea Moss entirely with mineral water
Optional: add lemon, ginger, cinnamon, etc. to your seaweed, depending on the benefits you choose.
Store in the fridge with the lid on
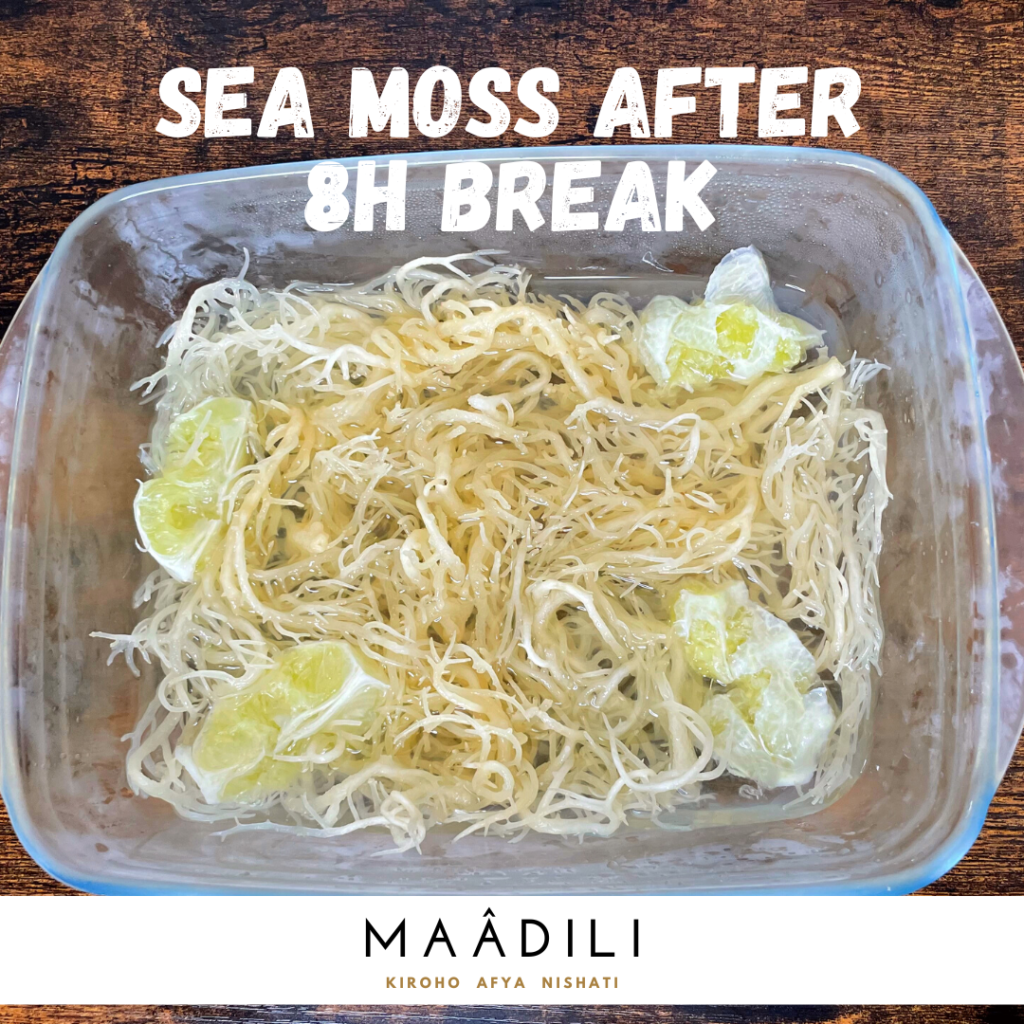
Have you seen the evolution between this image and the previous one? The Sea Moss has more than tripled in volume!
It’s ready to be mixed!
I leave my Sea Moss overnight, for 7-8 hours. You can use it after a 5/6-hour break without any problem.
Step 4:
Retrieve the Sea Moss you’ve left to stand with its lid on in a refrigerator, after your resting time.
Remove any lemons or other added ingredients
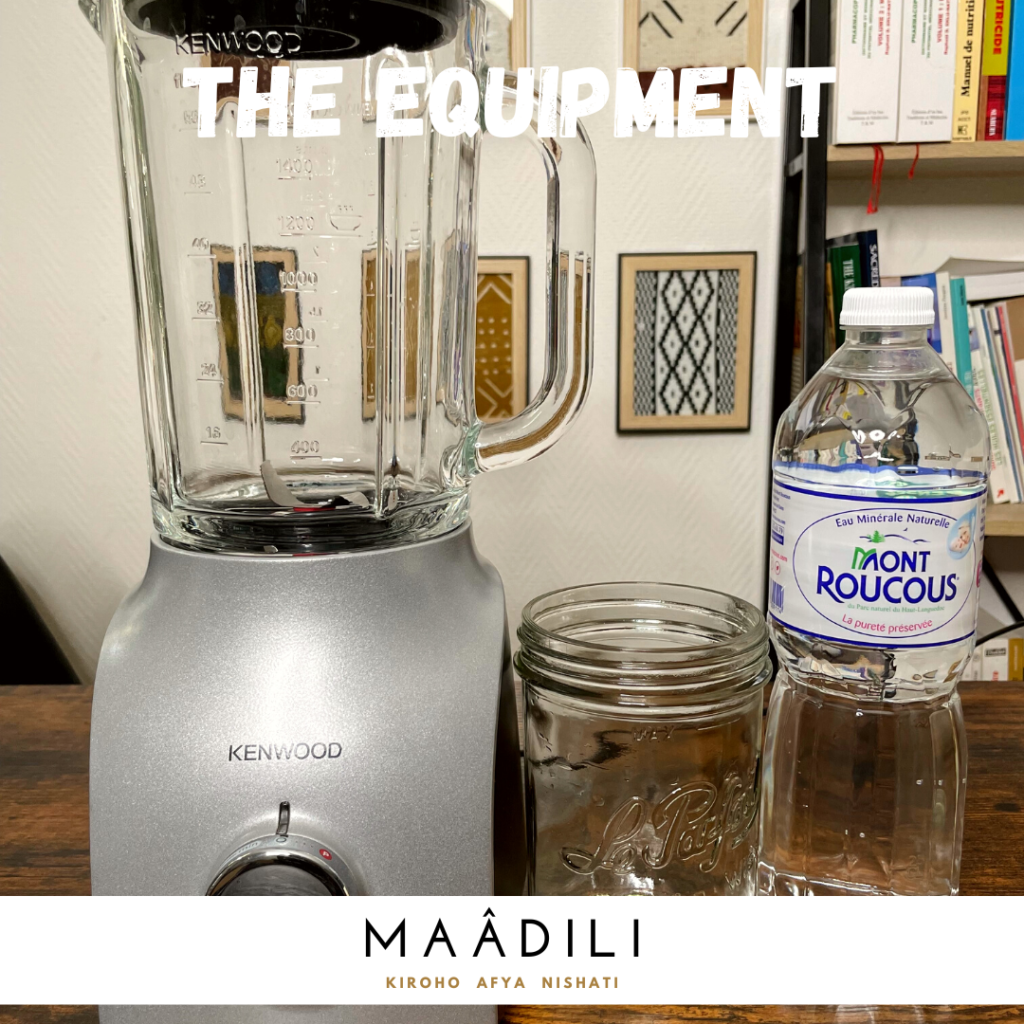
The equipment required is simple and accessible to all.
Recommendation: use quality water, ideally neutral or alkaline. As Sea Moss is already alkaline, using water that does not impair its functions will optimize your body’s remineralization during use.
Step 5:
A blender
An airtight jar
Neutral or alkaline water
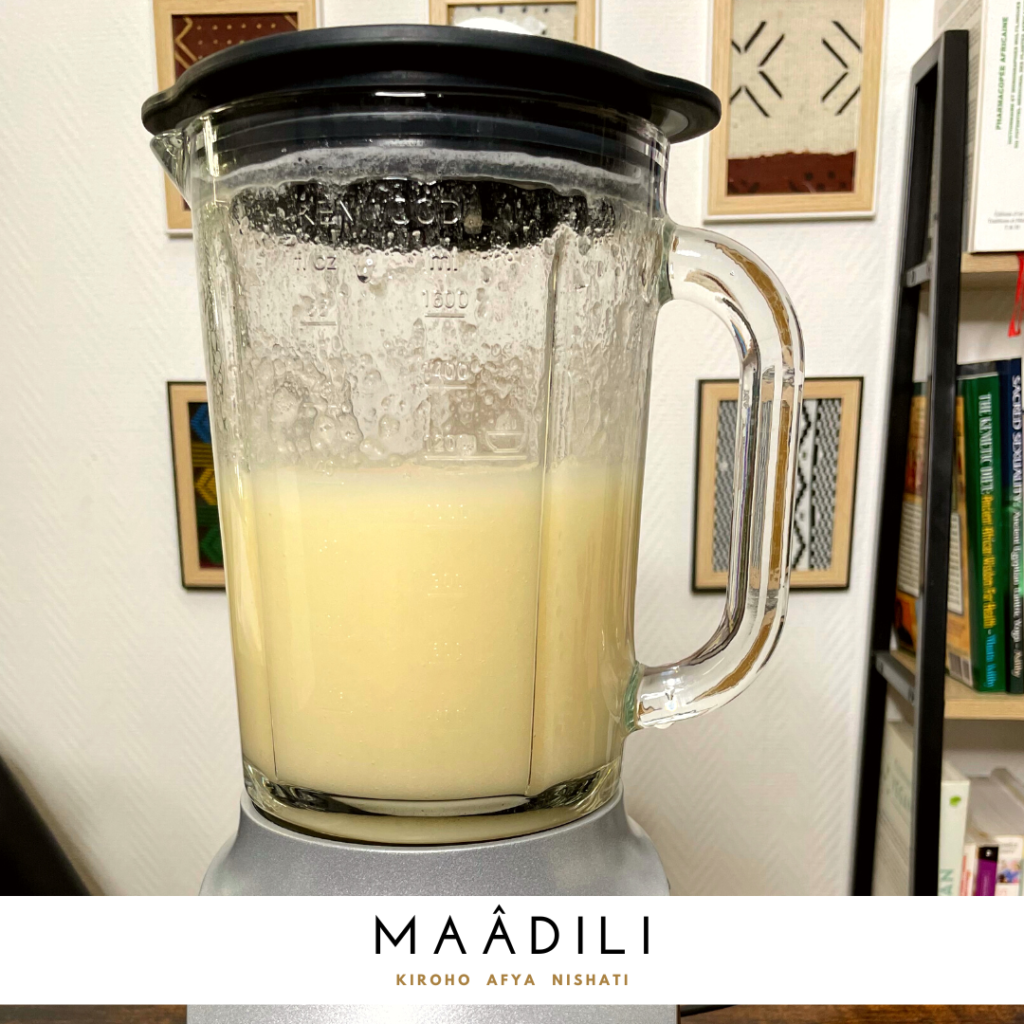
The « mixing » stage is very important for two reasons. Firstly, the amount of water you pour in will determine the final consistency of your gel. I therefore recommend that you pour the water halfway up your seaweed, then gradually adjust.
Here, knowing my needs and tastes, I adjusted the water to the same level as Sea Moss.
Secondly, water incorporation. If this is your first time, I recommend using bottled mineral water only.
If you’re used to drinking it, or if you don’t mind the iodized taste of seaweed, I recommend adding the nutrient-rich « rest » water halfway up, then topping up with your bottled water.
Step 6:
Pour your Sea Moss into your blender Option n°1: add water halfway up, then adjust Option n°2: add « rest » water at half-height, then top up with bottled water
Mix and it’s ready 🙂 .
Step 7:
Blend gradually, not all at once! This way you avoid heating up your Sea Moss and, retain all the nutrients without burning them through the blades.
My favorite consistency (before refrigeration)!
Once mixed according to my recommendations, you’ll get this consistency. Why is it my favorite?
Once cooled, your gel thickens. It’s therefore important that the texture is smoother or « less dense » than you’d expect, so that it can fully meet your needs after a few hours in the fridge.
For my part, I use Sea Moss in smoothies, fruit and vegetable juices in the extractor or in cold sauces, so for it to adapt to all my textures, without « lumps » I prefer the consistency to be smooth enough so that even once chilled, it remains malleable according to my needs.
Step 8:
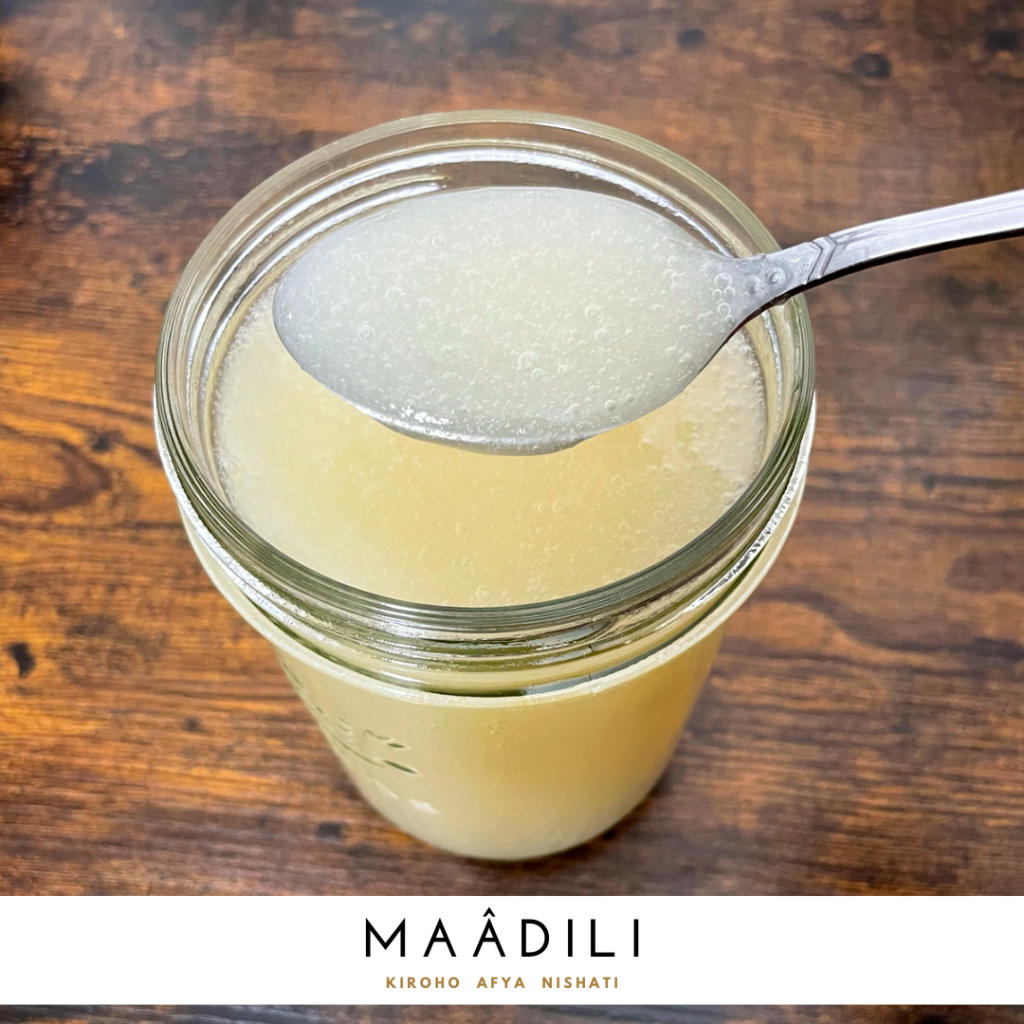
Put into jars and refrigerate
Your Sea Moss is ready!
Once refrigerated, you’ll retain its optimal properties for 7 days, before they gradually diminish. Don’t hesitate to observe and smell your composition, as preservation can vary according to the temperature of your fridge, and the quality of your jar (glass, plastic, hermetically sealed or not, etc.).
My recommendations:
Airtight glass jar with lid
Refrigerator temperature between 3 and 5°C maximum
Shelf life from 7 to 10 days
Use 1 to 2 tablespoons in juices, smoothies, sauces, etc.
1 dose in the morning on an empty stomach for a boost of energy
If you’d like to know all the benefits of our St. Lucia Sea Moss, discover new recipes, and find out how to use this seaweed whether you’re a Woman, a Man, for your child or teenager, or for Pregnant and Breastfeeding Women, discover our Guide to Everything you need to know about Sea Moss available right here.